0

Presets

Lightroom Presets

Bring your photos to life with just a few clicks.

Click on the download button to get the preset pack.

Note: These presets will serve as a starting point or help you find inspiration.

I have written a step-by-step procedure on how to use install and use these presets on desktop as well as mobile. Jump to how-to

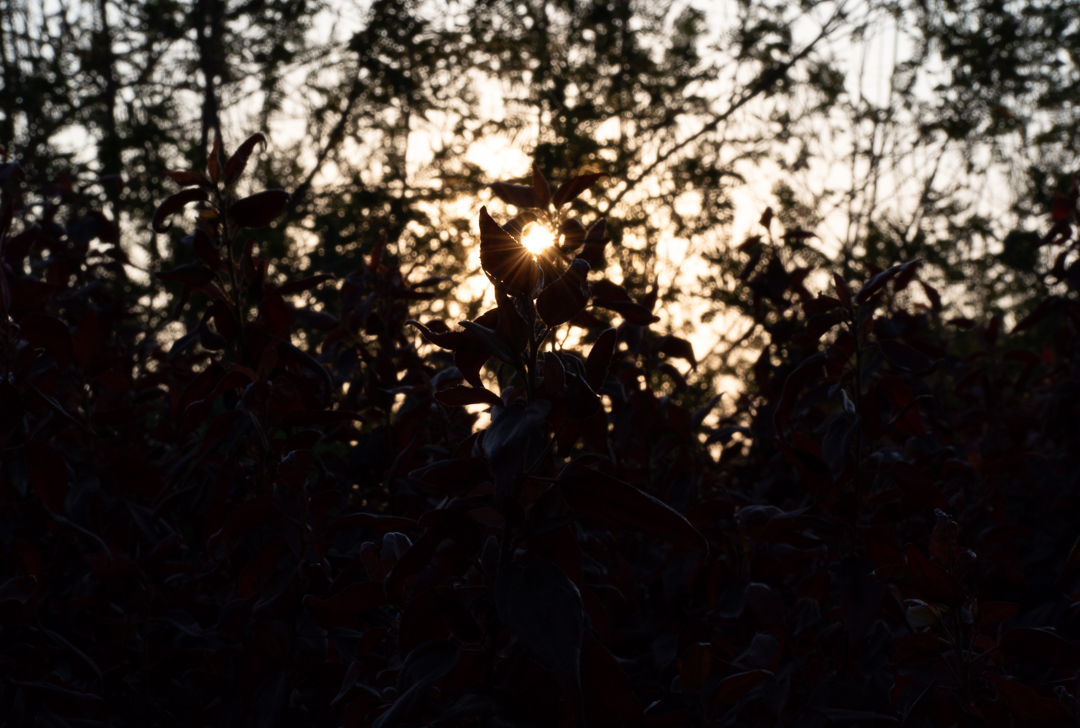
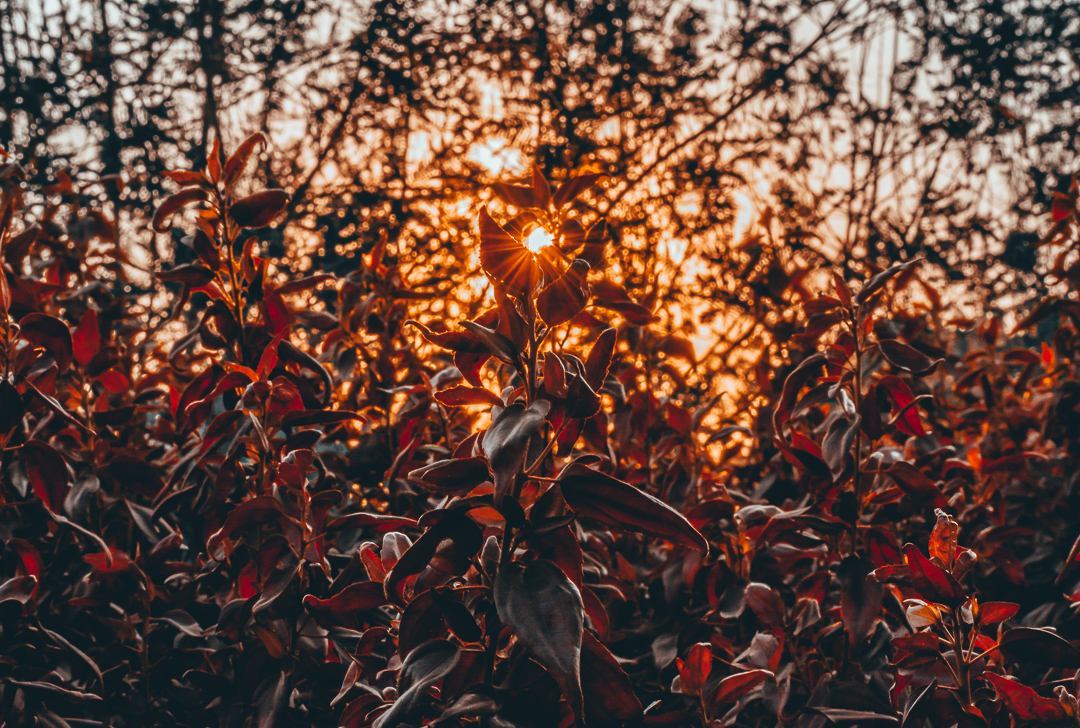
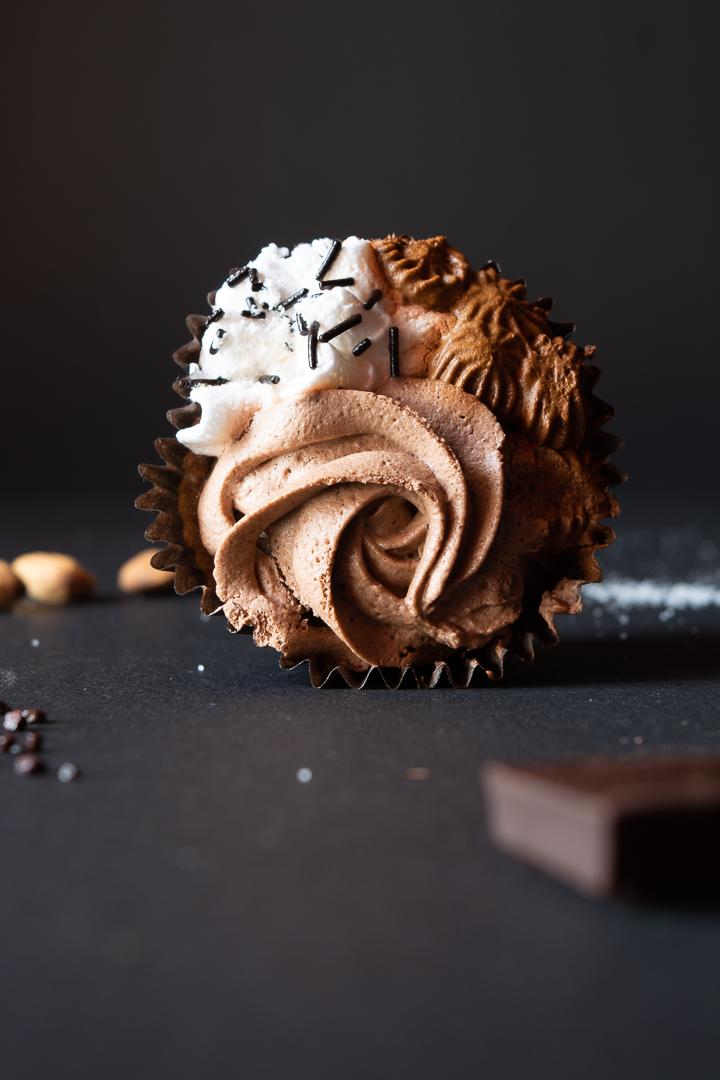
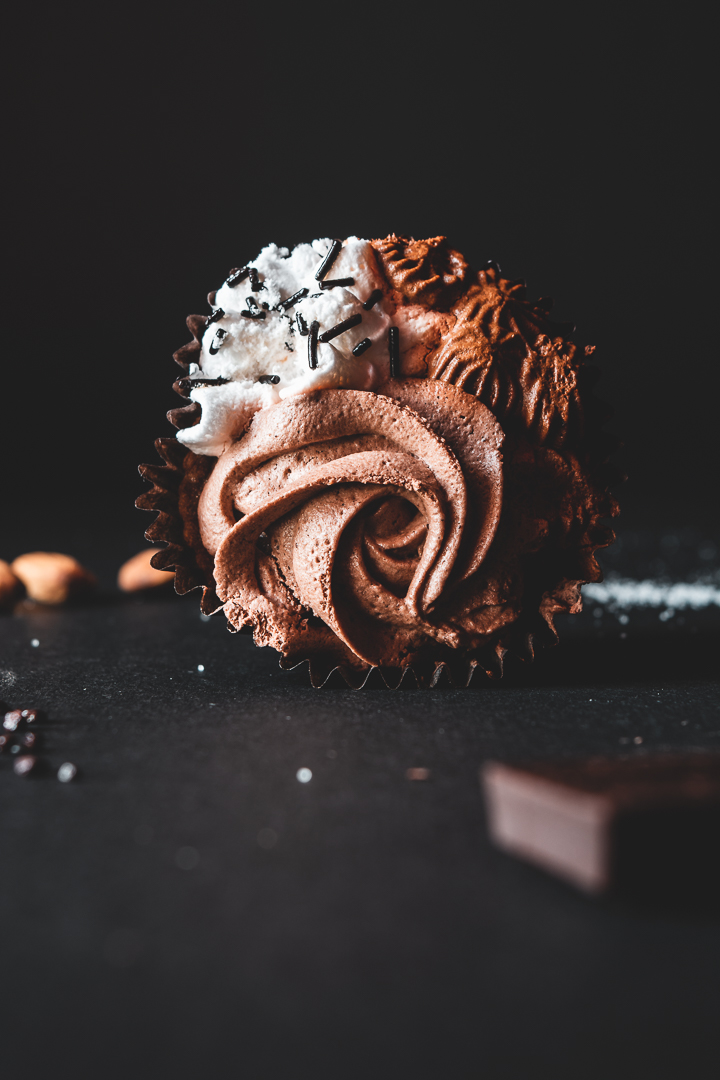
Below are a few before-after sample images.

This pack contains 10 presets for both desktop & mobile

These presets are FREE. If you liked the presets and would like to support my work or you have been following my work for some time and would like to buy me a cup of coffee, you can scan any of the codes on the right and send in any amount that you wish. Every contribution, big or small, helps more than you think.

Google Pay / UPI
PayTm

smaple images

Edited using the ‘Bright Punch’ preset from the pack

Edited using the ‘Backdrop Killer’ preset

For Pastel Muted Minimal Basic Tones

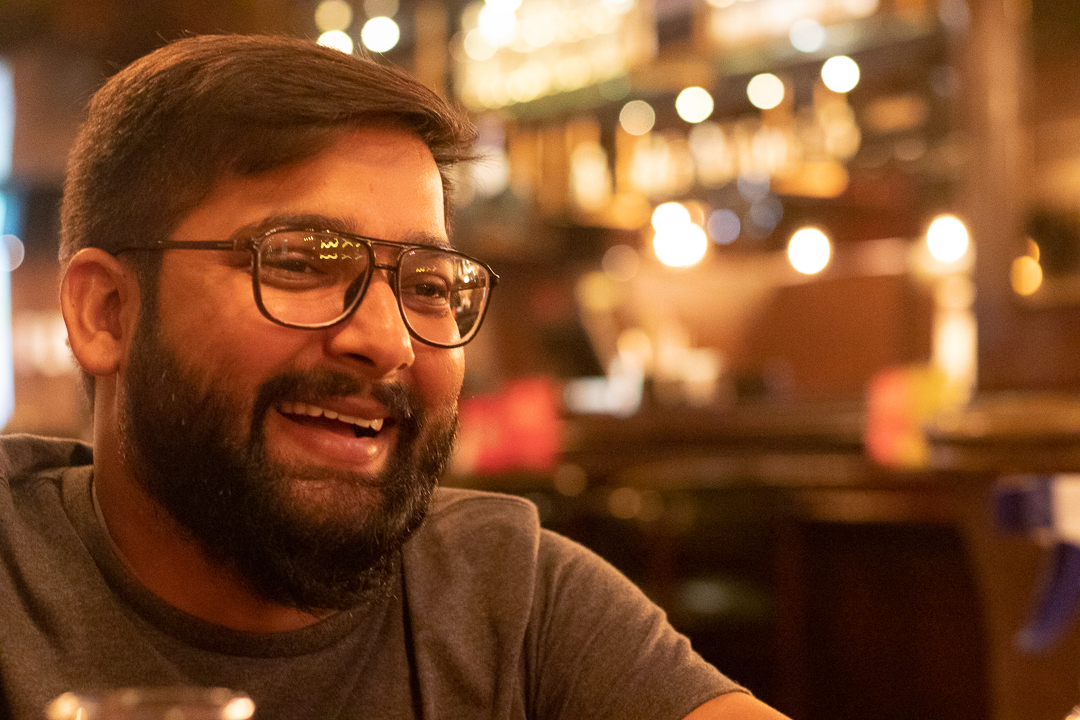
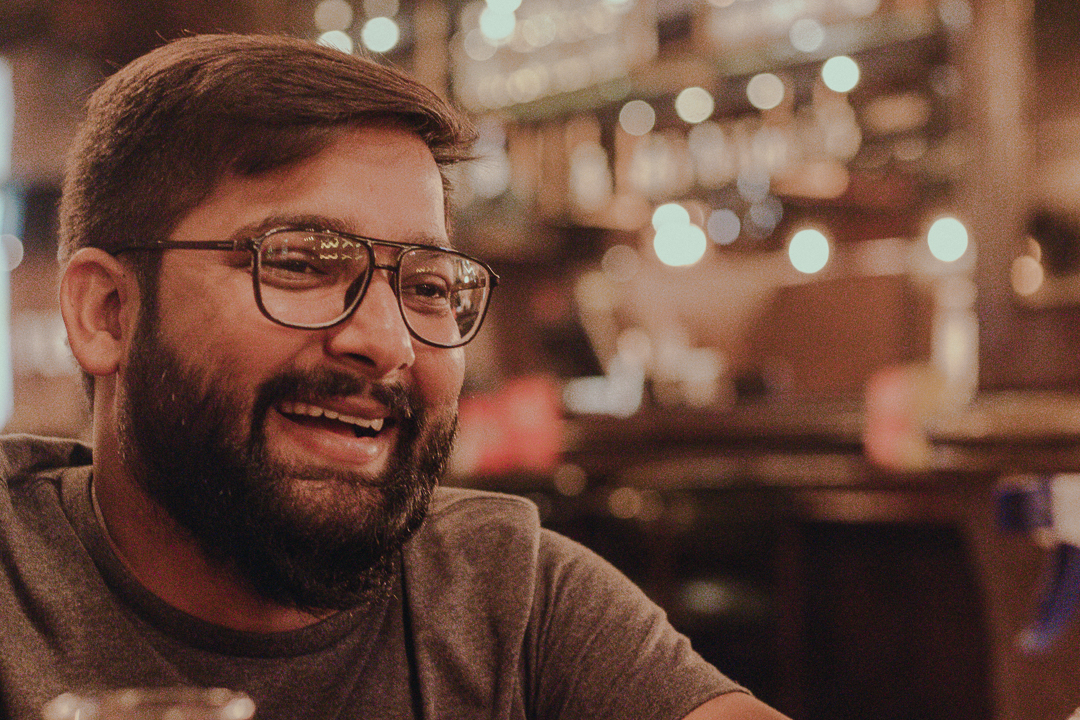
Edit using the ‘Muted Portrait’ preset

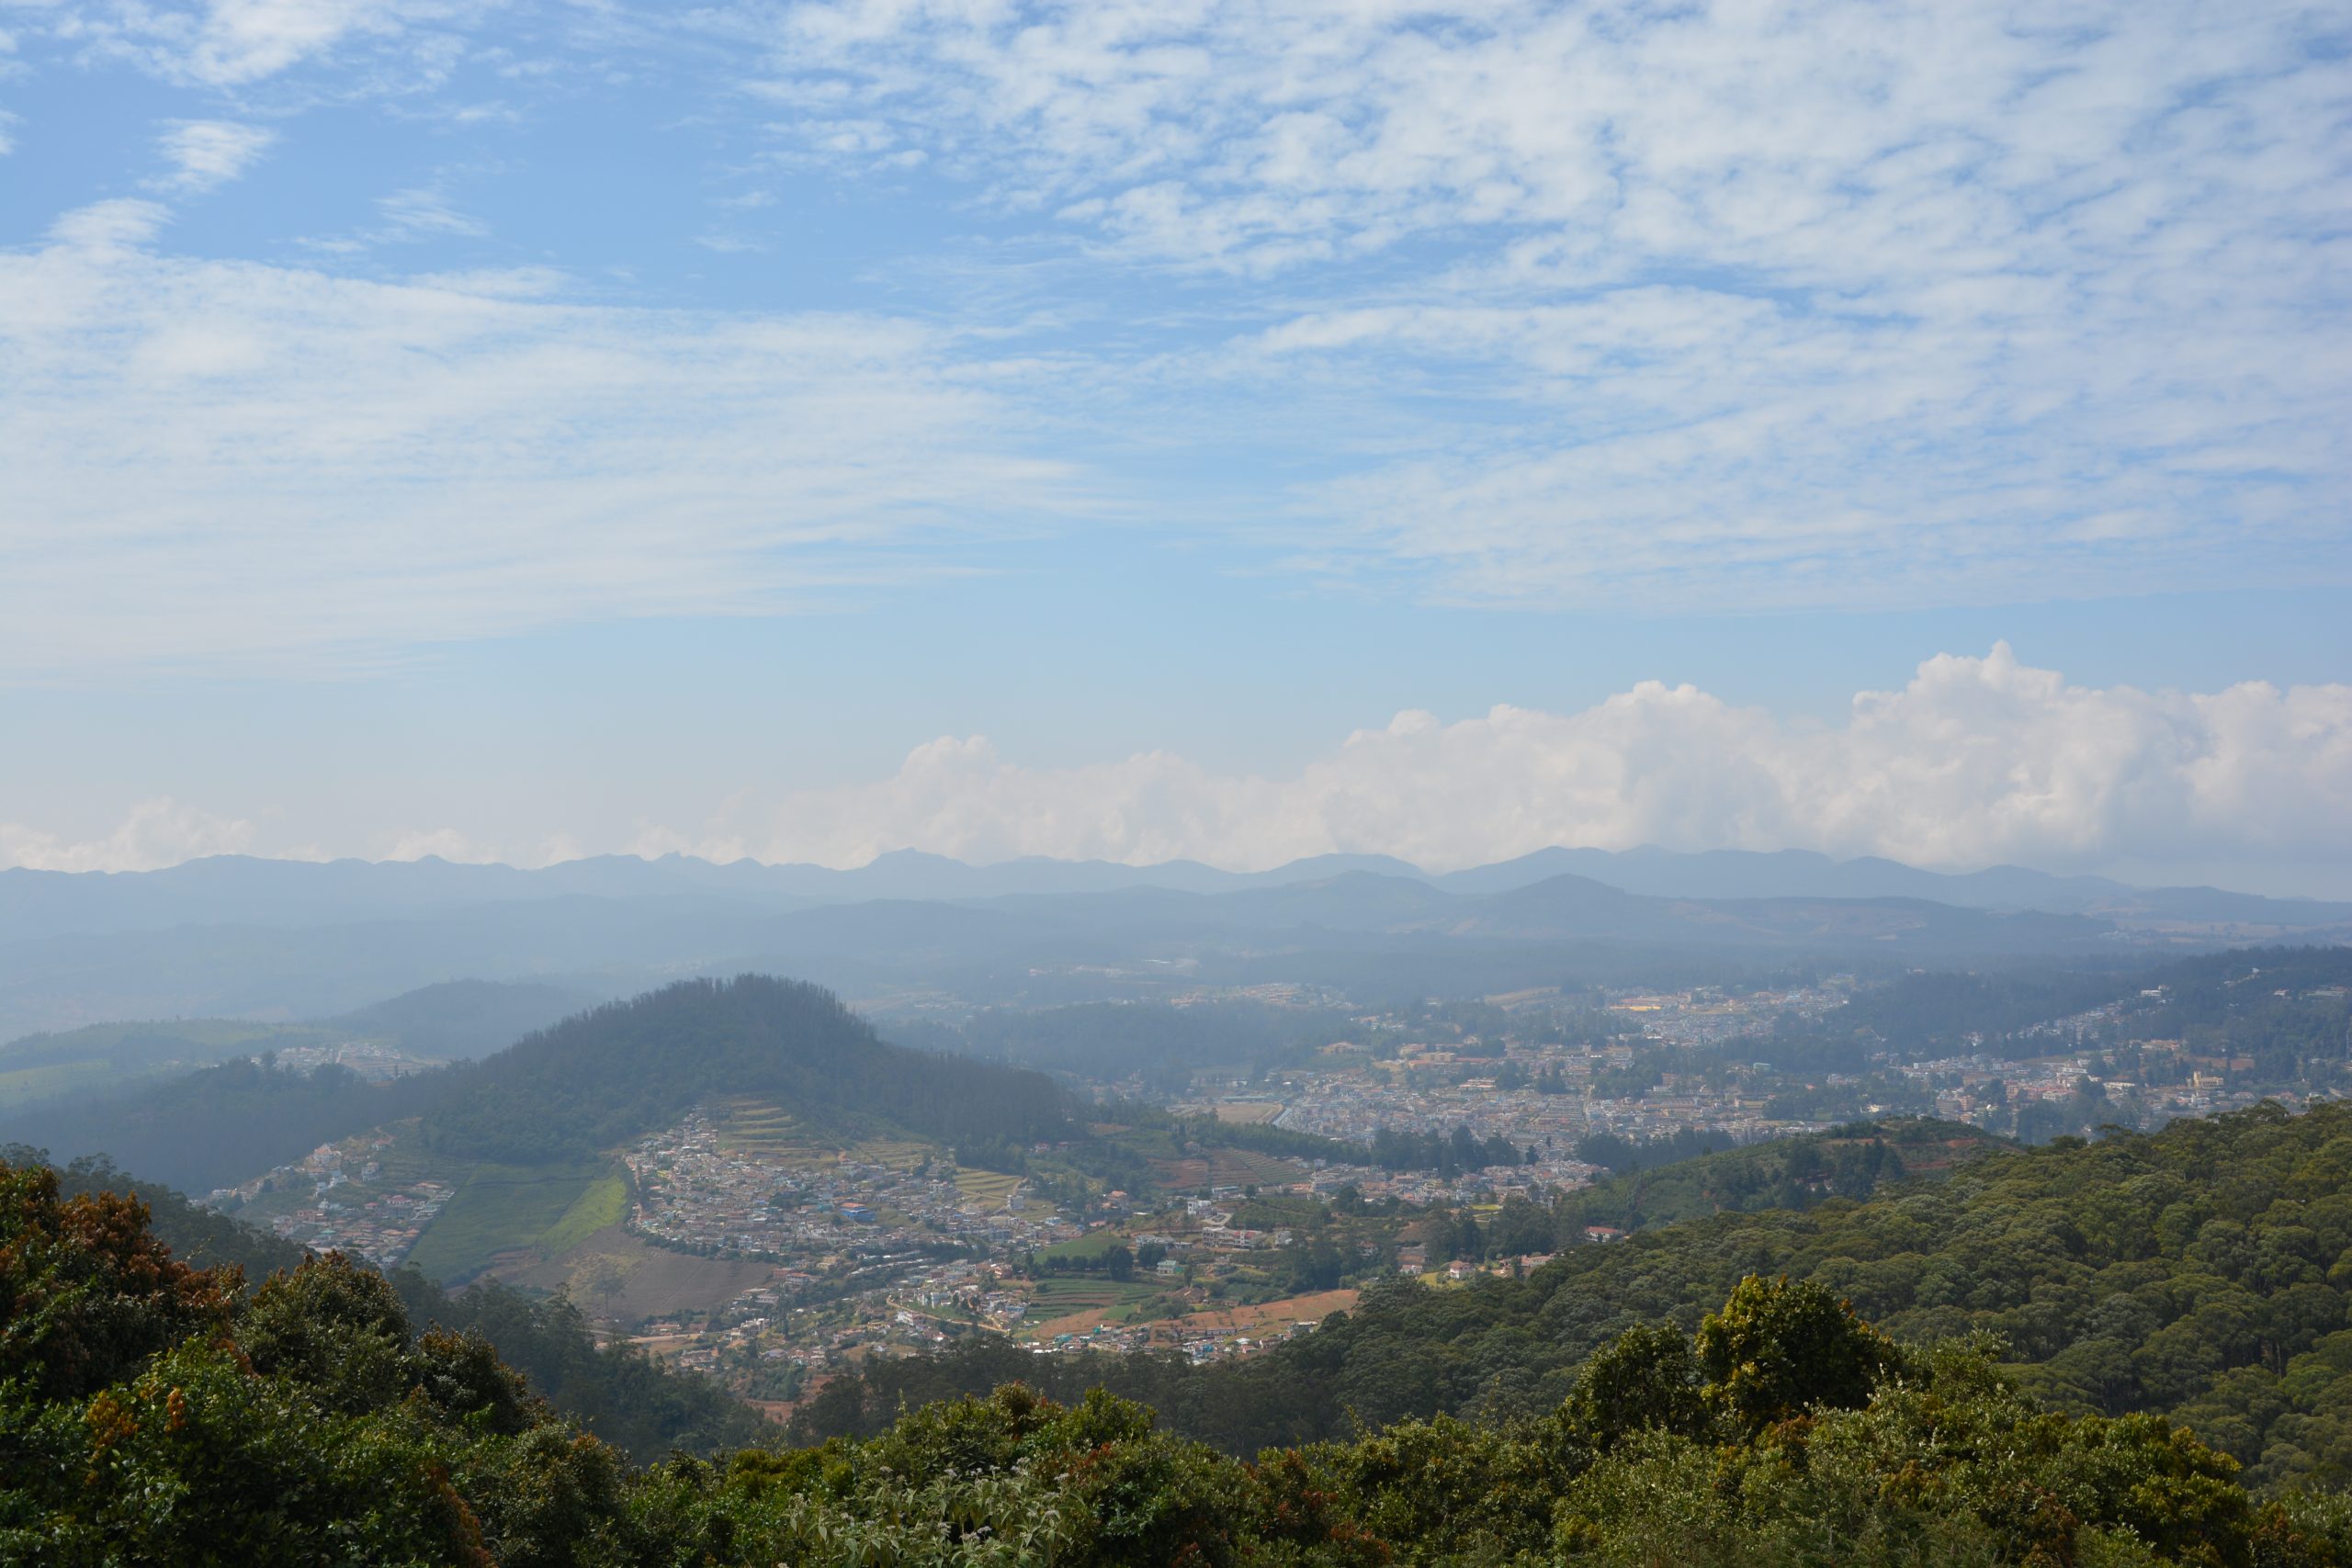
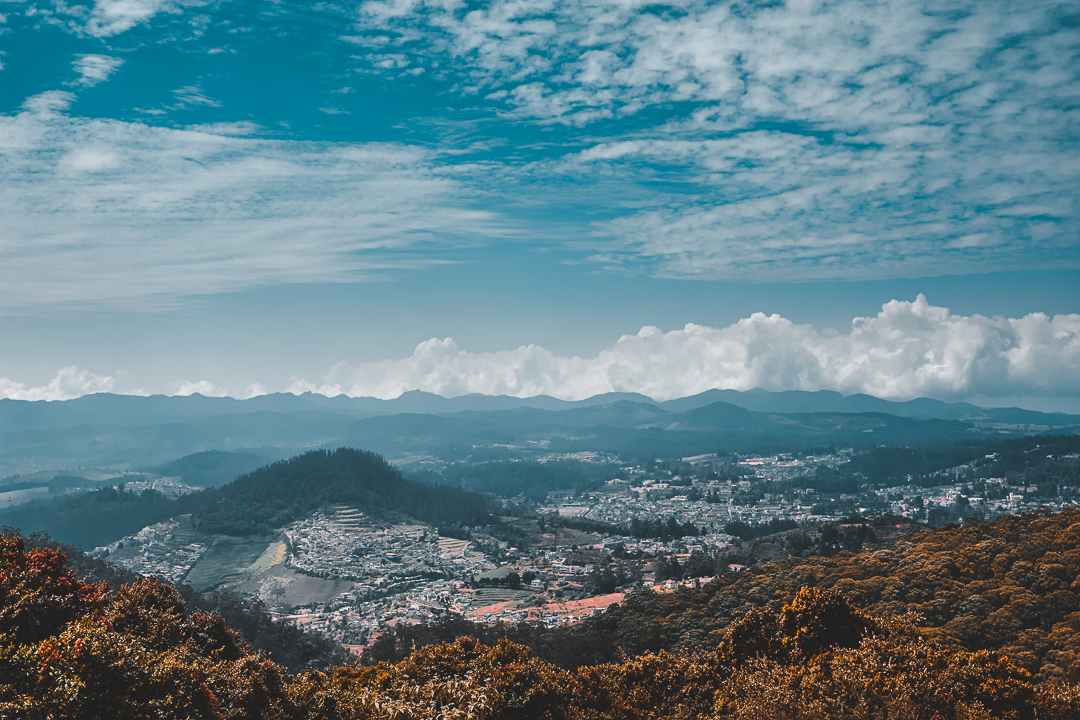
Edit using the ‘Orange Landscape’ preset

How to install presets
In LIGHTROOM Desktop
  1. Unzip the downloaded file
  2. Open Lightroom and click on Preferences and go to the Presets tab
  3. Click on the button Show Lightroom Presets Folder
  4. Double click on the Lightroom folder, then double click on Develop Presets folder
  5. Navigate to the unzipped folder ‘The Final Shot Presets Pack’ and copy the folder ‘The Final Shot Desktop Presets’ into the Develop Presets folder
  6. Restart Lightroom and you‘re done!
In LIGHTROOM Mobile
This requires a small one time setup
  1. Unzip the downloaded file either on your phone or unzip it on your PC and copy the ‘The Final Shot Mobile Presets’ folder to your phone
  2. Open the Lightroom app
  3. Create a new album to house just the preset DNG files. To create the new album, tap the + to the right of the “Albums” section title. Then tap “Album” when it appears at the bottom
  4. Tap the three dots to the right of the album name. Select “Add Photos”, then select where the files from the ‘The Final Shot Mobile Presets’ folder and tap “Add”
  5. You have the DNG files loaded into the Lightroom app, so let’s go ahead and save those Lightroom presets! Open up one of the photos from your folder of DNGs. I recommend starting with the top left and going in order so you don’t lose track
  6. With the DNG photo open, tap the three dots in the top right corner. When the options appear, select “Create Preset”
  7. A list of options and checkboxes will appear. These let you select which settings you want to include in the presets. This screen is also where you name the preset and can create a separate folder for it
  8. Select everything, tap the checkmark to save the new Lightroom presets
  9. Next, repeat this process with each DNG file in the folder!

How to use the mobile presets
  1. Now that you have the presets saved in the Lightroom app, it’s very easy to use them. Open a photo that you want to edit
  2. At the bottom of the screen, you’ll see the sections with settings you can adjust. Scroll to the far right to reach the “Presets” section
  3. The presets section at the bottom of the app screen houses all your saved Lightroom presets
  4. Tap into the Presets section, select the folder with the preset you want to use. Then tap the preset you’d like to apply. Lightroom even creates mini thumbnails showing a preview of that preset applied!
  5. When the preset is selected and you want to keep it, tap the checkmark to finalize

Liked it? Share it with your friends and family!

Hey, right click is disabled on this website